Siding experts Baltimore: We Supply Expert Exterior Cladding Replacement To Enhance Your Home'S Toughness And Appearance
Exploring the Varied World of Siding Products
When you consider siding installation, what's the first image that pops into your head? Is it the traditional appeal of wood, or maybe the sleek, modern appearance of vinyl? The reality is, the choice of siding products can change not just the outside of a home, however its whole personality. Let's take a stroll through a few of the most popular choices and discover what makes every one tick.
Wood Siding: Classic Sophistication
Wood siding whispers stories of tradition and craftsmanship. It ages with dignity, establishing a patina that numerous property owners value. Beware-- wood needs attention. Without correct upkeep, it can come down with rot or bugs. Have you ever appreciated a centuries-old home with glowing wood siding? That warm, inviting aura doesn't come without effort.
Vinyl Siding: Low Maintenance Champ
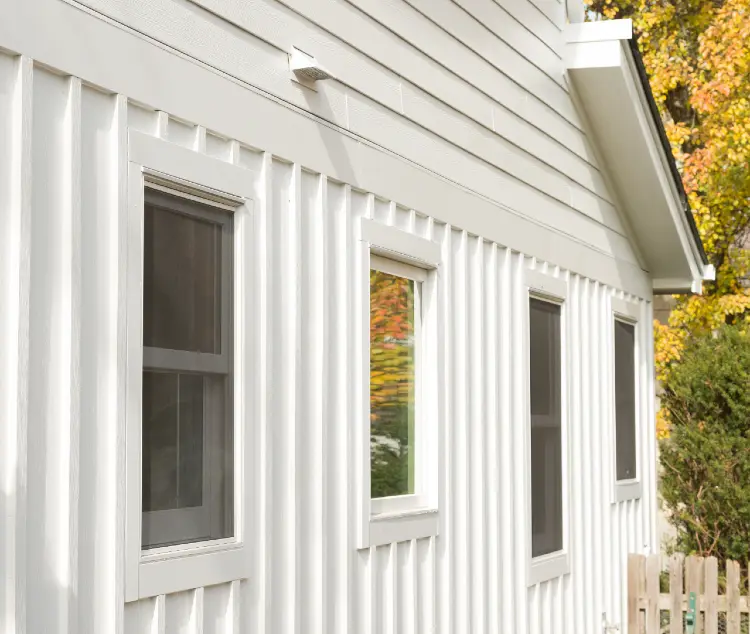
Vinyl siding typically steals the spotlight for its sturdiness and ease of care. It withstands fading, cracking, and peeling, making it a preferred for hectic property owners. Yet, some state it lacks the soul of natural products. Still, its cost and range of colors make vinyl a practical option that fits lots of budgets and styles.
Fiber Cement: The Versatile Competitor
Picture a product that integrates the best of wood and vinyl-- welcome to fiber cement. This siding imitates the texture of wood, however laughs in the face of fire and pests. It resembles the superhero of siding materials. Though installation needs an experienced hand, the payoff is a robust, long-lasting exterior with a touch of elegance.
Metal Siding: Industrial Style Satisfies Toughness
Metal siding is not just for barns any longer. Aluminum and steel alternatives bring a smooth, modern edge to property homes. They resist weather extremes and are remarkably light-weight. But does their often cold look fit every community? That's a concern worth pondering.
Other Noteworthy Options
- Brick veneer: Traditional and strong, using a timeless look with very little maintenance.
- Stucco: Smooth and Mediterranean, best for warmer environments.
- Stone veneer: Adds texture and luxury without the heavy expense of complete stone walls.
| Material | Upkeep | Sturdiness | Expense | Visual Appeal |
|---|---|---|---|---|
| Wood | High | Moderate | Medium to High | Warm, natural |
| Vinyl | Low | High | Low to Medium | Differed colors |
| Fiber Cement | Moderate | Extremely High | Medium | Wood-like texture |
| Metal | Low | High | Medium | Modern, streamlined |
Each material has its story, its strengths, and its peculiarities. The genuine question is: which siding will best echo the soul of your home? Siding installation isn't simply about defense-- it's about expression. So, as you weigh your choices, consider what story you want your walls to inform.
Preparation and Surface Area Inspection: The Unsung Heroes of Siding Installation
Envision trying to dress a house in a new coat, however below, the skin is peeling, damp, and riddled with covert rot. Would that fresh exterior hold up, or would it end up being a costly error? Preparation is not website simply a step-- it's the very structure of an effective siding installation.
Why Surface Area Inspection Can not Be Rushed
One glimpse at a relatively sound wall can be deceiving. Below layers of old paint or cracked vinyl, moisture damage and structural decay often hide. Ignoring these subtle signs is like developing a castle on sand. Here's what you need to inspect before the first nail enters:
- Wetness Levels: Utilize a wetness meter to find dampness inside the walls-- hidden water can undermine siding adhesion and invite mold.
- Structural Stability: Tap boards for softness or hollow noises, revealing possible wood rot or termite damage.
- Old Siding Condition: Examine if the existing siding is securely attached or peeling away; loose siding should be removed to avoid future warping.
- Flashing and Trim: Inspect for rusted or harmed flashing that might leakage behind the brand-new siding.
Expert Tips to Nail the Preparation Stage
- Clean Completely: Pressure wash or scrub the surface to eliminate dirt, mold, and mildew. Dirt can avoid sealants and adhesives from bonding effectively.
- Level the Surface: Utilize a leveling tool to discover irregular areas; shim or sand down high spots. An unequal substrate results in noticeable ripples or spaces in the siding.
- Repair and Change: Address any damaged sheathing or framing immediately. Replacing just one rotten stud can conserve thousands in future repair work.
- Install a Wetness Barrier: Apply a weather-resistant barrier to defend against water seepage, particularly in rainy environments.
Typical Oversights That Cost Time and Money
| Oversight | Consequence | Expert Service |
|---|---|---|
| Avoiding Moisture Check | Hidden water promotes mold and siding failure | Use a wetness meter and delay siding up until dry |
| Stopping Working to Remove Old Siding | Causes uneven surface area and bad adhesion | Strip old siding and prep the bare wall |
| Neglecting Flashing Condition | Water leaks behind siding causing damage | Replace or repair flashing before setup |
Ask yourself: how confident are you that the wall beneath your future siding is all set to withstand weather condition and time? Precision in preparation is the distinction between a siding task that lasts decades and one that requires premature repair work. Remember, the very best siding is just as good as the surface area it holds on to.
Accuracy in Preparation: The Foundation of Siding Installation
Before the very first panel touches the wall, meticulous surface preparation is non-negotiable. Envision avoiding this step-- you risk trapping wetness, causing rot or mold. The secret depend on a comprehensive examination: eliminate old siding thoroughly to prevent damaging the sheathing, and guarantee the wall is dry and flat. A crooked substrate will haunt your siding's appearance and durability.
Tools like a chalk line and laser level become your best pals here. The chalk line isn't simply for marking straight lines; it's your visual compass, guiding each slab into ideal positioning. And when walls decline to be true, a laser level reveals the subtle dips and bulges that your eye may miss.
The Art of Nailing: More Than Simply Hammering
It's tempting to believe that pounding nails rapidly is the method forward, but in siding installation, skill surpasses force. Overdriven nails can warp panels, while underdriven ones stop working to protect them properly, letting wind sneak in. Always choose nails that are corrosion-resistant and of the right length-- too short, and you risk weak anchorage; too long, and you might puncture vapor barriers.
- Nail spacing: Preserve constant intervals, usually 16 to 24 inches, depending upon siding type.
- Attaching method: Drive nails straight, perpendicular to the wall surface area to avoid warping.
- Allowance for growth: Leave a small gap between nail head and panel surface area to accommodate natural material movement.
Cutting Corners? Reconsider-- Cutting Panels Right Matters
Cutting siding panels needs precision and the right tools. A handheld circular saw with a fine-tooth blade makes sure tidy edges without splintering. For vinyl or fiber cement siding, a score-and-snap method can be effective, however beware-- improper cuts can lead to cracks or irregular joints. Always determine twice, cut as soon as.
Have you ever discovered how some siding jobs look like patchwork quilts? Frequently, that's the result of inconsistent cuts and careless joints. Utilizing jigs or stops on saws can create uniform lengths, making your siding appear smooth and expert.
Setup Series and Weatherproofing
The order in which you set up starter strips, panels, corner trims, and soffits impacts the siding's longevity. Beginning from the bottom and moving up permits water to shed naturally, mimicking nature's own drainage patterns. Overlapping edges must always face downwards-- consider it like shingles on a roofing.
| Installation Step | Key Pointer | Typical Issue to Prevent |
|---|---|---|
| Starter Strip | Guarantee level positioning for the first row | Uneven base resulting in uneven siding |
| Panel Placement | Leave growth spaces (1/8 inch) | Panels buckling or cracking in heat |
| Corner Trim | Overlap edges securely to avoid drafts | Water infiltration at joints |
The weather condition plays a quiet yet powerful role-- install siding when temperature levels hover within recommended ranges to prevent product contraction or expansion that could jeopardize the fit. Ever battled with siding that deforms after a cold wave? That's the material reacting to incorrect installation conditions.
Upkeep and Repair Work Methods for Siding Installation
When it pertains to preserving siding setup, a fast look might trick you into thinking it's practically occasional cleansing. Underneath the surface, the real test lies in preserving the stability of your siding versus time's silent erosion. Ever seen a little fracture on your vinyl siding and dismissed it? That tiny fissure might invite moisture, leading to mold growth and even structural decay. Do not neglect these subtle warnings.
Finding Early Signs of Wear
How typically do you perform a comprehensive examination? Lots of property owners only examine their siding throughout spring cleaning, missing out on the subtler signs of damage after severe winters or heavy storms. Here are a few specialist tips to assist you identify concerns before they escalate:
- Try to find discoloration or fading, which can indicate UV damage or poor paint adhesion.
- Tap the siding lightly; hollow sounds may reveal wetness behind the panels.
- Look for loose or warped boards, as these can interrupt the protective barrier.
- Inspect caulking around doors and windows-- weather can trigger it to split or peel.
Repair Methods That Extend Longevity
Fixing siding is more than covering holes or repainting. It's about comprehending the material and the environment it lives in. For example, when handling wood siding, a basic sanding followed by a quality guide and paint can restore its appeal-- but skipping the guide can be a pricey oversight.
Vinyl siding demands a various approach; distorted sections might need to be thoroughly popped out and replaced to maintain a seamless look. And for fiber cement siding, precise attention to sealing edges prevents water intrusion, which is frequently the silent perpetrator behind early deterioration.
Advanced Repair Work Tips:
- Utilize a moisture meter to identify covert dampness before beginning repair work.
- Apply a flexible, weather-resistant caulk around all joints and nail holes.
- Match paint colors utilizing a spectrophotometer for near-invisible touch-ups.
- Replace damaged panels completely rather than patching when rot or mold is obvious.
Regular Upkeep List
| Upkeep Job | Frequency | Specialist Pointer |
|---|---|---|
| Cleaning siding surfaces | Twice a year | Use a soft-bristle brush and mild cleaning agent to prevent surface damage |
| Inspecting for cracks or spaces | Quarterly | Focus on corners and joints where weather condition exposure is greatest |
| Repainting or resealing | Every 5-7 years | Select paints with UV security and mildew resistance |
| Checking caulking and seals | Each year | Replace brittle or cracked caulk immediately to prevent leakages |
What's the expense of disregard? Beyond cosmetic blemishes, improperly maintained siding can result in moisture seepage, welcoming bugs or triggering insulation to lose effectiveness. The expression "a stitch in time conserves nine" rings especially real here-- timely, educated upkeep protects your investment and assurance.